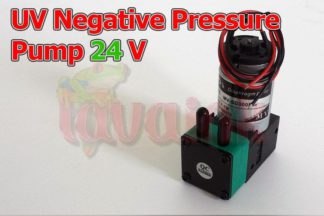
Description
How to set up uv negative pressure
Set up uv negative pressure is the key for maintaining UV Ink. The ink line absolutely requires a perfect negative pressure. Too little negative pressure, and the ink will drip out uncontrollably. Too much negative pressure, and the ink will be sucked backwards and you would not be able to print. Even slightly higher than optimal pressure may cause the ink flow to stop in the middle of printing.
The optimal amount of negative pressure will always change set up uv negative pressure, because it is affected by many factors such as external ambient air pressure, type of ink, and ink viscosity, which in turn may be affected by the ambient temperature. It is likely that the required amount of negative pressure will change if you change ink or equipment, and may also change with the seasons. Therefore, frequently monitor the state of your ink line to make sure the pressure is perfect. The most common technical problem that is reported is caused by the negative air pressure, and this commonly occurring “problem” can be easily solved if you watch for it.
Note that if the ambient temperature is low enough, such as during winter climates, then the initial temperature of the machine will be low, but temperature will rise after the machine is turned on for a while. Adjust the pressure according to the temperature that the machine will operate with after it is turned on for a while, not the initial temperature. Lavaink provides the option of adding an external heater on the print head and the sub-ink tank to bring the temperature to the stable point faster. At the start of the workday, close the valve of the ink at the print head, and let the ink cycle for a few minutes. This will flush out any sediments. Then continue printing as usual.
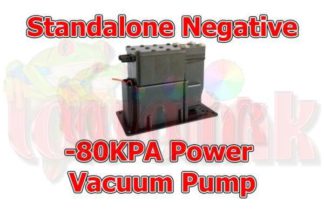
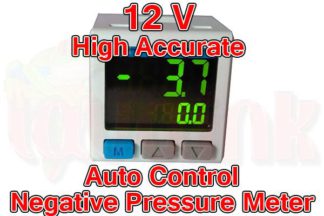
There are two valves that control the negative pressure in the ink line. One valve offers coarse control, and is located inside the machine. Open the machine’s lower compartment doors to access it. The second valve is located conveniently on the control panel and offers fine control of the negative pressure, up to increments of 0.01kpa. If your negative pressure requires large adjustments, use the coarse valve first, and once the pressure is in approximate range, fine tune with the other valve on the control panel.
Make sure your uv ink line is sealed perfect!
How to know your uv ink line is sealed perfect? After one day printing, you close uv ink line carefully and make sure close correct for each ink line. And then next day morning to check uv head surface if there is ink dropped down. It’s perfect ink line sealed if there is no ink dropped down otherwise uv ink line somewhere is loosed. Buy our uv ink damper that is guarantee to sealed uv ink line perfect due to our uv ink damper does not have more connection at uv printer parts
Make sure uv ink line is sealed perfect and then you can go to the following steps to set up uv negative pressure perfect. Maintaining UV Ink.
To set the perfect amount of negative pressure:
- If this is the first time setting a value for the negative pressure, start with a value of -2.5kPa. This will most likely have to change. Maintaining UV Ink.
- After turning on the machine, flush the print heads with cleaning fluid. Then fill them with ink. Make sure that all the cleaning fluid is actually replaced with ink in the print head, as you want to observe the pressure’s effect on the ink rather than the cleaning fluid.
- Observe the ink at the very exit of the print head. You may require a flashlight to see clearly. Be careful not to expose the print head to too much light as the ink is designed to cure when exposed to UV light.
- If the ink moves back up into the print head, it means the negative pressure is too much and is sucking the ink back in. Decrease the negative pressure: for example if it was set at -2.5kPa, then adjust it in the direction to zero, for example, to -2.0kPa. Adjust by increments of 0.1 to 0.5kPa, depending on how fast the ink was being sucked back. This of course, requires some experience.
- If the ink drips out from the print head, it means the negative pressure is not enough. Adjust the negative pressure in the opposite way as Step #4.
- After adjusting the negative pressure, flush again with cleaning fluid and fill with ink. Repeat the observation and flush and fill with ink as necessary until a state of equilibrium is observed. Maintaining UV Ink.
- Equilibrium means that the negative pressure keeps the ink exactly at the print head, neither sucking it back in, nor letting it drip out.
- Once the pressure is set to an equilibrium, adjust the negative pressure by -0.1kPa. For example, if it was -4.0kPa at equilibrium, you want to adjust this to -4.1kPa.
- This slightly more negative pressure than the equilibrium is the perfect amount of negative pressure.
- To be sure you have the correct pressure, after Step #9, repeat the flush and ink fill again. Then observe for 1 to 2 minutes. The ink should be sucked back very slowly. Maintaining UV Ink.
- The many times of flushing and ink filling previously may have left drops of ink around the nozzle. Use the specially designed lint-free cloth to touch the droplets and absorb them. Do not wipe the nozzle carelessly, as that may damage the nozzle.The white ink is more prone to sediment buildup than the other inks. Therefore, at the end of each work day, the white ink should be taken care with this special step: flush the white print head with cleaning fluid, and do not refill with ink. This leaves the cleaning fluid in the print head for the night until the next time you use the machine. This prevents sediment build up in the white ink’s print head. At the start of each work day, recycle white ink for a while to move old white ink in the sub ink tank to go back into ink bottle and fill in sub ink tank with new white ink. This is only necessary for white ink and is not necessary for the other colors.
- It should be clear by now that control of the negative pressure is very important to the UV printing process. LavaPrint provides machines with the best precision and stability in control of the negative pressure. Lavaink machines control the pressure to a precision of 0.01kPa, and keeps fluctuations to less than 0.1kPa. In contrast, other machines control pressure to a precision of 0.1kPa, and therefore may experience large fluctuations as much as 0.5 kPa. At such fluctuation, the printing quality may drop while in the middle of a printing job. Maintaining UV Ink line.